My tool of interest is ArcMap, which is a desktop software from the developers of the ArcGIS Online program that we have used in class. It can perform many functions that the web version doesn’t have access to, but for the purposes of this tutorial I will be focusing on its georeferencing capabilities. I had to use this program while working on my final project, since the site we used in class only offered 1 free use and I had to reference over 10 maps. ArcMap allows users to upload maps and layers directly to ArcGIS Online, which makes accessing and sharing them after they are referenced very easy.
To start, boot up windows on any lab computer in CMC 110 (the Hacking the Humanities classroom) and download a jpg file of the map you need to reference. For files only available in PNG format, there are numerous free PDF to JPG converters online.

Next, select “Blank Map” from the popup window (it should be the default option if you aren’t opening an existing ArcMap file)
Click on the “add data” button (the plus sign over a diamond in the upper left corner) and select “Add Basemap”. This is the easiest way to reference maps that you don’t have existing map files to reference from. My favorite is the topographical map, since it shows vegetation cover, roads, and cities.

To add the image of the map, repeat the previous step but click on “Add Data” instead of “Add Basemap”.

To find your file, click on the picture of the folder with a plus sign. This allows you to navigate outside of the default ArcMap storage location. Once you find your file, select it and click “Add” in the bottom right corner.
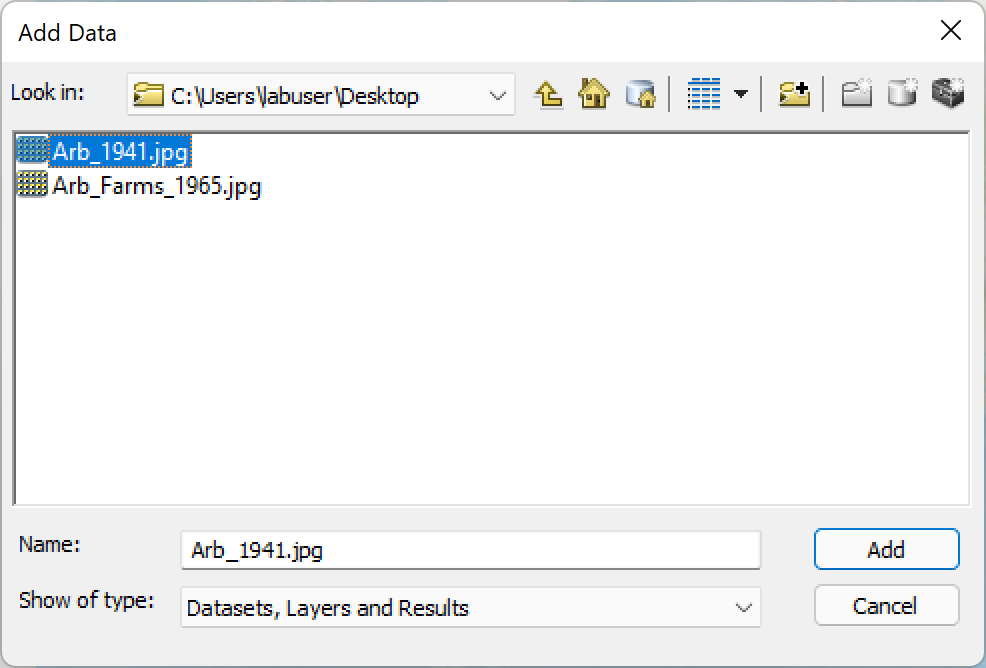
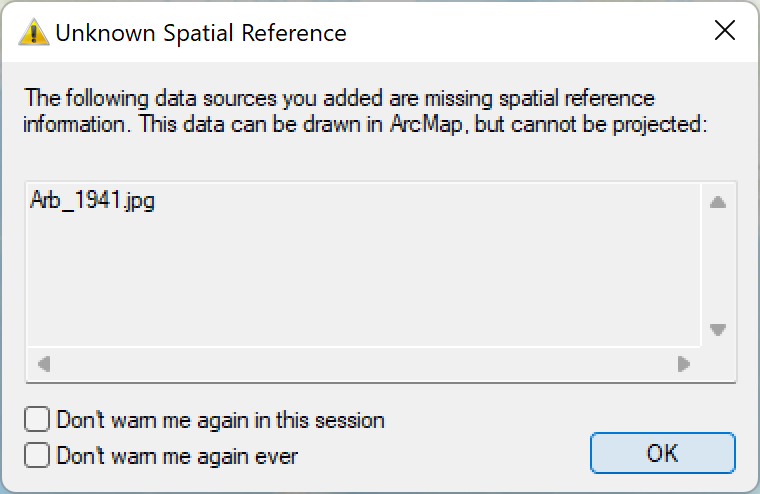
A warning message will display, saying that there is no spatial data accompanying the image you selected. This is fine, since this data is about to be added. Click “OK” and continue.
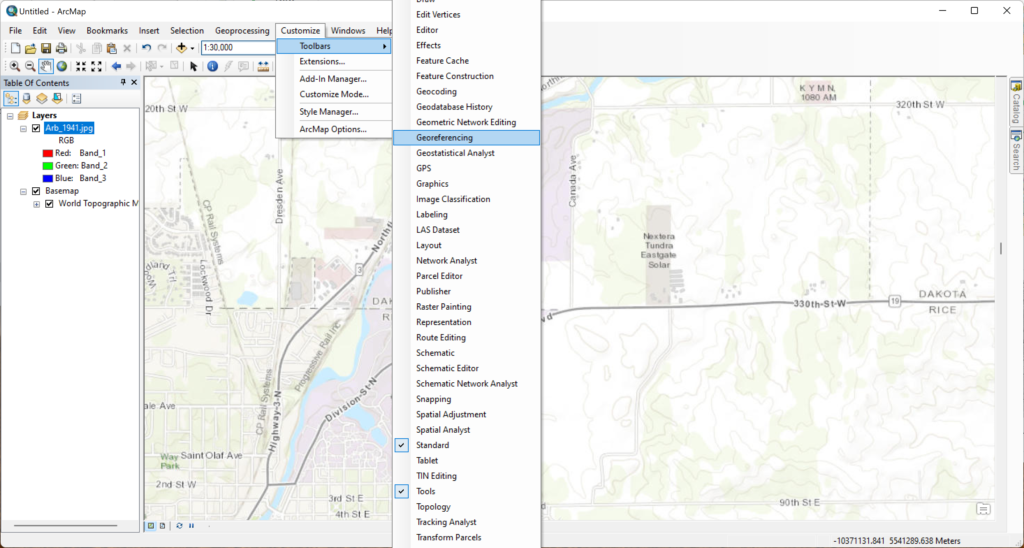
Now that all the necessary ingredients to georeference are here, add the “Georeferencing” toolbar to the window by selecting “Customize”, “Toolbars”, and “Georeferencing”.
The name of your image file should appear in the georeferencing tab, but it won’t display on the screen yet. To show your map, find the area on the basemap you will use as a reference point, click on “Georeferencing”, and select “Fit To Display”.

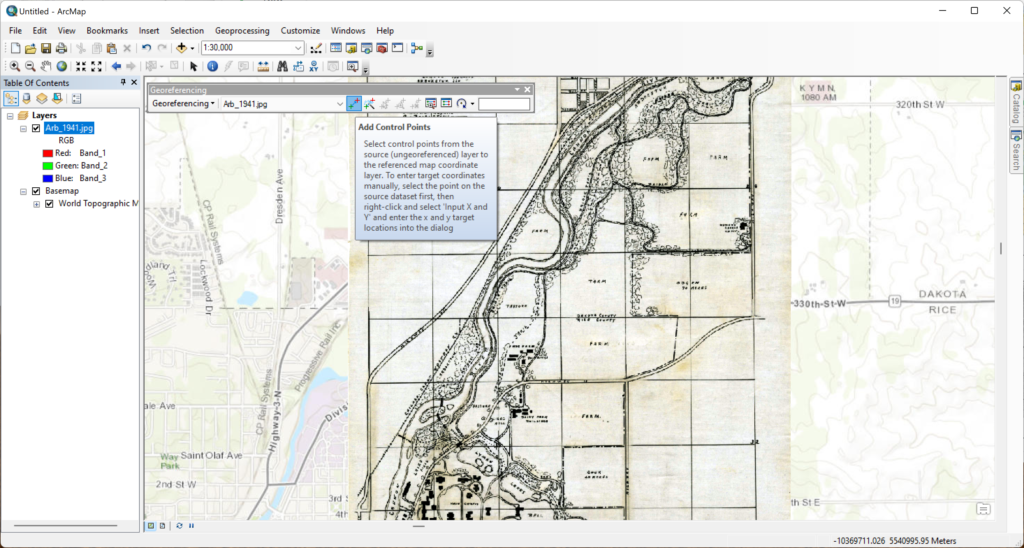
To begin the process of fitting your map image to geographic coordinates, click on the left-most of the 8 georeferencing toolbar buttons. This should be “Add Control Points”. Click on a distinctive locationon your map image (intersections of roads are always a good bet for more recent maps). Then, uncheck the box next to the map file name to make it transparent, and click the same location on the basemap. Repeat this process several times across the map image.

Now that your map is accurate, it’s time to upload it to the Carleton GIS site. Start by clicking “Update Georeferencing” in the “Georeferencing” drop-down menu to save your work. Then, remove all layers other than your georeferenced map (or suffer the consequences with an unusable 1500 terabyte layer because you included the globe-sized basemap).

Then, select “File” and “Sign In”.

To sign in to your Carleton account, click the blue button that says “YOUR ARCGIS ORGANIZATION’S URL”. Enter “carleton” in the next window and continue, which should bring you to a login window for your personal Carleton student account.

text

After signing in, go to the “File” menu again, this time selecting “Share As” and “Service”.
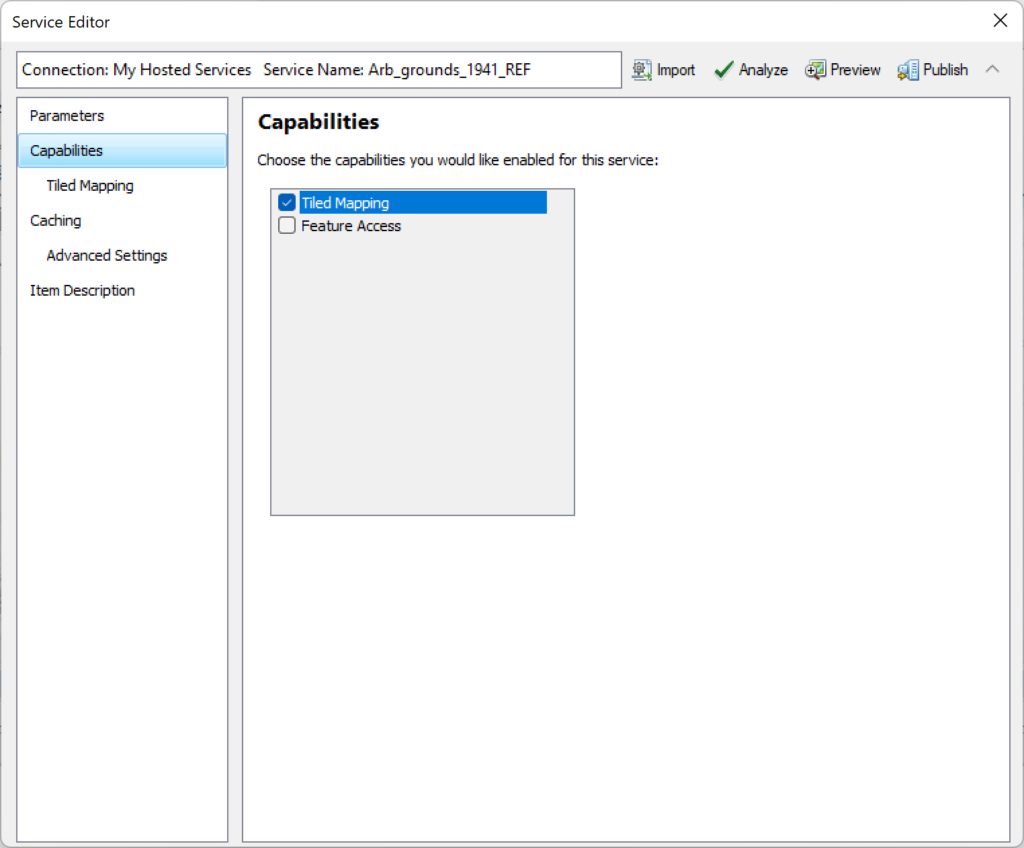
Under the “Capabilities” section of the pop-up window, make sure that only “Tiled Mapping” is selected, unless you really know what you’re doing and want to shoot for the moon.

Under the “Caching” menu, adjust the scales at which your map will be visible. The broader your range, the larger the file will be, especially as you get into the higher levels. The file size also increases exponentially at higher levels. For instance, making my example map viewable from levels 13-19 (after removing the basemap) was about 28 megabytes. However, 14-19 is a slightly smaller 28 MB while 13-20 is 35-40 MB. Keep this in mind, since your upload space is not unlimited.
Finally, click “Publish” in the top right corner, select the Carleton gis server, and enter a name and any required sharing information/metadata. Congratulations, and thank you for using my tutorial!
ADDITIONAL RESOURCES:
2 thoughts on “ArcMap Georeferencing Tutorial”
Comments are closed.
Wow this looks like a really cool and use full tool. My group also did GIS stuff for our final and I think this would have been pretty good to have. Once this class is over do you see yourself continuing to use ARC map in any other disciplines?
This was a really useful tutorial, and looks like a very helpful tool in the future. I can see many uses for this, and I’m really glad I was able to learn about it in such a short time with your tutorial. Do you think that it would be possible to increase the upload space?